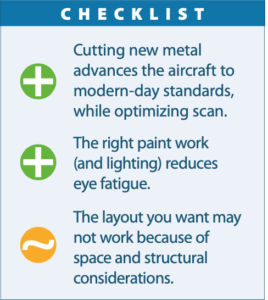
Along with engine swaps, full-up avionics upgrades are the biggest investment you can make for your bird, and when you’re handed an invoice equal to the value of the aircraft shouldn’t you fly away with the panel layout you want? Based on conversations we’ve had with buyers, that doesn’t always happen. Hold the cutting tools.
One of the problems is that the techs doing your upgrade may not be pilots, and that means they may not appreciate the importance of getting the right panel ergonomics. It could be as simple as misplaced rocker switches and warning lights or worse—the wrong placement of primary displays and autopilot control heads.
Luckily there are some things you can do to avoid this heartache, including using a good software program that accurately runs the layout possibilities for a given aircraft. Herewith is a guide for planning custom layouts—the first time.
DREAM BIG, THINK PRACTICALLY
As with most big purchases, buyers tend to focus on flagship options, when in reality that’s out of the budget and perhaps excessive for the purpose. And that’s an important part of the planning that you as the aircraft owner and pilot need to nail: Define the purpose of the avionics upgrade. What you want might not be what you need—a topic for a separate article.
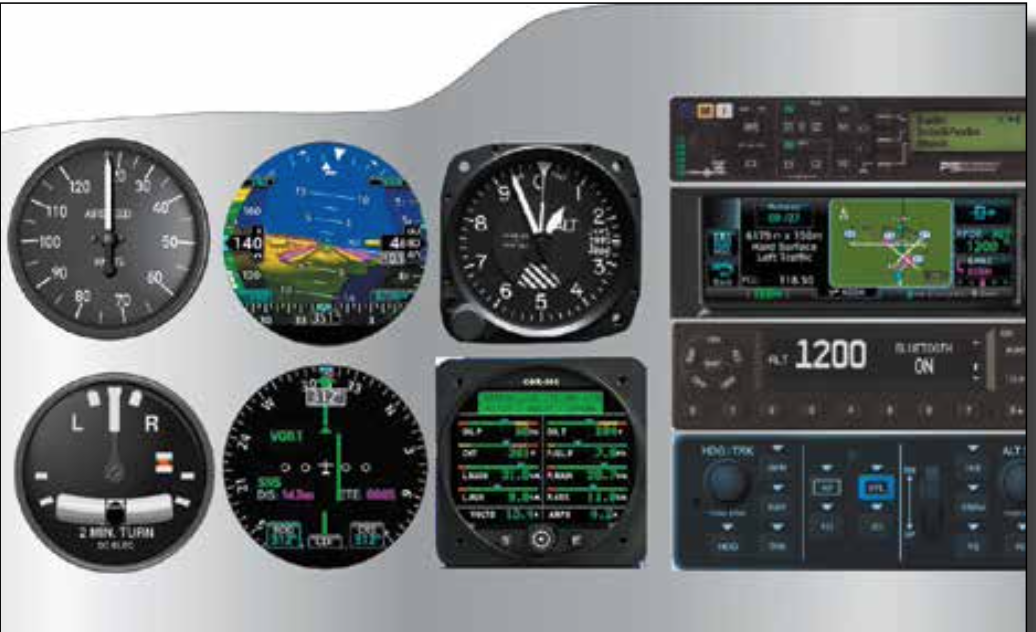
Once you decide on the gear that works for your flying and budget, you’ll need to determine if it will work in your panel. That could be as easy as using the existing round instrument cutouts (Garmin’s GI 275, the uAvionix AV30 and Aspen Evolution flight instruments are three examples), or as complex as having to cut a new metal panel.

The other thing to consider is required depth behind the panel. Some panels are deceiving—there may be lots of real estate on the surface of the panel but clearance behind it is an issue. Maybe some equipment will be in the way of the flight controls and maybe fuel lines, vacuum lines and wiring bundles are in the way.
One benefit of going with an all-electric avionics suite is the ability to remove the vacuum system, if the equipment configuration supports the regulatory requirements. Don’t underestimate the amount of space that’s required behind the panel for the vacuum lines and the central filtering system and even the depth that’s required of traditional flight instruments and gyros. Plus, without the vacuum lines in the way, the avionics will be easier to maintain and upgrade, moving forward. Think beyond the aesthetics.
Once you have a general idea of which equipment you want, fly the aircraft to a shop (or two or three) and ask to sit with a tech to brainstorm in front of the panel. Good shops will be patient and go the extra mile to help plan the layout. Once you’re seated in the cockpit together, ask if the shop representative is a pilot. Many are not, and that sometimes means they don’t appreciate the importance of a good flow. This includes placing critical systems like fuel indicators, engine monitors and backup flight instruments in the best locations.
For installation in certified aircraft, there are often layout requirements specified in the equipment’s STC, and also in the FAA’s advisory circular AC 423.1211-1C. This is so the instrument falls within a prescribed field of view—or the ability to effectively see the information when seated in the pilot’s seat. Additionally, some installation manuals specify a maximum distance between a navigator and its interfaced nav display. The installer will measure a straight-line distance from the radio stack to the display and will need to place the equipment within the confines of the STC. This usually isn’t a big factor on smaller panels, but in larger panels like the ones found in turboprops and even larger twins, your desired layout might be limited.
The manual for Garmin’s latest TXi-series STC’d retrofit flight display is pretty specific about how it needs to be installed on the panel. It has to be completely viewable and within reach when sitting in the pilot’s seat. Moreover, Garmin advises that the screen should be located as far up the instrument panel as practical, and not interfere with flight controls or control locks.
We’ve seen installers locate primary flight displays in a way where the control knobs get in the way of removable control locks. It wasn’t caught until the owner actually flew the airplane home, tied it down and attempted to put the control lock in. That’s poor planning.
While the panel is torn down, it’s a good time to address worn shock mounts. Some panels float on damping mounts, but for some installations where a display has built-in AHARS (the Garmin TXi is one), the shock mounts have to come off.
PANEL PLANNERS

Shops may use a variety of methods for planning a new custom panel, depending on who is doing the cutting. Some farm it out and others will cut in house. Some, not all, use panel planning software, and one popular program comes from Colorado-based One Mile Up. The company was started in 1988 as a graphics company, originally creating content for the government and its contractors. Turns out the demand was so high for aircraft drawings that it eventually branched out to create scaled drawings of military and general aviation aircraft.
The company offered us a version of its Panel Planner J, a program that works on Mac and PC and is available in pilot/owner and shop versions. We tried the $495 pilot/owner level software on a Mac and found that it had a thorough database of avionics (new and old), and it updates often to refresh new/updated models.
The interface is fairly utilitarian, which isn’t a bad thing. From the drop-down window on the left side of the workspace, you drag full-color realistic alpha-channeled images of instruments, avionics and in some cases cockpit accessories (annunciator panels, as an example) into place on an aircraft panel template. The company says there are roughly 2000 instruments/avionics components and roughly 800 panels to work with.
We like that the Panel Planner software tracks total cost (list price of the equipment), its total weight and the peak current draw and then generates an equipment list. It has the capability to print actual-size hole-cutting templates and color mockups when connected to a desktop printer.
Ultimately the Panel Planner exports to a CAD file that a fabrication shop might be able to use. The program can’t account for some details, like actual space that’s available behind the panel, and it’s not the say-all for what will and won’t fit.
Of course, some have drawn panels on their own using open-source CAD-style modeling software to design and lay out dimensionally accurate panel arrangements, and then export them as .stl files for CNC fabrication. There are also CNC-capable fabricators that will do the legwork if you provide an equipment list, images or drawings. Of the shops we polled, less than half use an official panel planning program. But we think they’re resourceful for the owners doing preliminary planning.
THE RIGHT SHOP
That’s what you’ll need when planning a panel—one that understands the importance of good ergonomics (see the sidebar next page for more), and can keep your ideas on the rails. Remember, what you want won’t always be possible and good shops avoid surprises by keeping you involved in all stages of the project.
In our next panel upgrade series we’ll look at instrument and panel lighting options—a costly but necessary part of new panel fabrication.