Magnetic Compass Upkeep: More Than Fluid Fills

You might save money by helping with time-consuming calibrations, but a new replacement makes better sense than attempting major bench repairs.

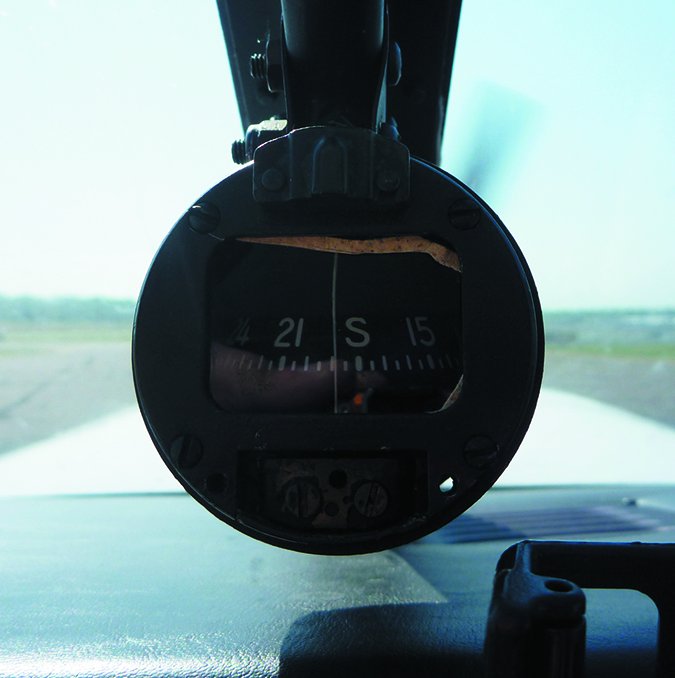
Among the minimum equipment required for VFR and IFR flying, FAR 91.205 still lists the magnetic direction indicator as a must-have item. Don’t confuse this with the gyroscopic (or equivalent) directional indicator. That’s required for IFR, in addition to a compass.

Given the primitive nature of a magnetic compass, owners are often shocked at the impressive invoices it can generate when it fails. And compasses do fail. Ever have one that leaked its fluid down the front of the instrument panel? The idea is to address the health of a compass before it comes to that. Even calibration—which should be done regularly—can be a time-consuming project.

In this article, we’ll address compass maintenance and replacement options, plus the procedure for calibrating one.

Routine Upkeep

Do you remember the last time your compass was checked for accuracy on a compass rose or with a calibrated site compass? Any changes in avionics (or even adding metallic objects to the glove box and around the panel) may affect the magnetic compass.

aircraft compass

Maintenance work can also cause sizable amounts of compass error, resulting from the placement of magnetic metals (ferrous screws/bolts) near the compass. Even the routing of wires under a cowl-mounted compass can cause magnetic interference, as can the installation and removal of equipment. Good shops include it in the final stages of an avionics upgrade, but you should ask if your installation includes a compass calibration.

As simple as a mag compass may seem, its maintenance is considered specialty work. According to FAR 65.81, any repair or alteration of instruments on certificated aircraft (a compass is one of those instruments) may only be performed by a certified instrument repairman. That also means if you calibrate one on your own, technically it should be supervised and signed off by an A&P.

More than one IA told us the only task they can legally perform on a compass is removing, replacing and calibrating it—no rebuilding. One noted that even topping a compass off with fluid is off limits, although the fluid is a necessary part of maintaining the instrument’s accuracy.

A partially drained compass will also contribute to the oxidation of the upper pivot bearing, which can make it stick or cause erratic readings. Some compasses are field-refillable, but save the Jack Daniel’s for your own consumption.

Alcohol (hence the whiskey compass designation) was used at one time, but now kerosene or aliphatic naphtha is used. The correct fluid is MIL-C-5020A.

aircraft compass fluid diaphragm chamber and rubber diaphragm

Alignment

Busy shops put compass alignment, often referred to as compass swings, in the same category as pitot/static system certification. Both tasks are equally disruptive to the schedule given the time-consuming process. But, it’s a necessary job.

The specific requirements to swing a compass may come as a surprise and are outlined in AC 43.13-1B. The advisory circular says the instrument should be swung anytime inaccuracy is suspected (off more than 10 degrees), after any cockpit mod involving ferrous metal and whenever the compass has been subjected to shock, such as a hard landing or severe turbulence.

The compass needs to be checked if the aircraft has passed through a severe electrical storm, after a lightning strike (this also may cause ferrous components in the structure to become magnetized) and whenever a change is made to the electrical system.

Even storing the aircraft can require calibration. This includes changing its permanent position to a different geographical location that results in a major change in magnetic variation.

Precision PAI-700 vertical card compass

Some shops charge a higher hourly rate for compass swings because it can require two technicians. It’s worth asking if you can assist, but understand that experience is required to get it right the first time—which even the pros sometimes don’t.

If you want to attempt it yourself, you can find an official compass rose. This is an interference-free painted area on the field for positioning the aircraft and making the adjustments. The rose is oriented to magnetic north, while cardinal points are normally painted 30 degrees apart.

The compass must be swung with the plane in a flight configuration, meaning a tailwheel airplane will need to be raised to a level flight attitude. The engine(s) should be running and all typical avionics and lighting used in flight turned on. That makes a big difference. Watch your compass swing to a new heading the next time you start or stop the engine and turn stuff on and off.

AC 43.13 recommends that the thorough procedure is done both with all electronics on—simulating basic flight condition— and with the avionics off. A compass card should be made to reflect both conditions.

Other than the sight compass, there really aren’t specialty tools required, although you will need to make adjustments with a brass or other non-magnetic screwdriver, and often a narrow tip is required.

What you adjust are the compensating magnets in the compass that are designed to compensate for electrical and magnetic influences of the aircraft. (They affect deviation, as opposed to the magnetic influences of the earth, or variation.)

SIRS Navigator

There are two screws on the face of the instrument (sometimes covered by a removable plate), which move the compensating magnets. The two screws are labeled N/S and E/W. Be sure to remove any material from the glove box and surrounding areas.

Put the aircraft exactly on magnetic north and adjust the N/S compensator screw until the compass reads 0 degrees. Turn the aircraft and put it on east and adjust the E/W compensator until the compass reads 090 degrees. Continue by placing the aircraft on 180 degrees and with the N/S screw, remove half of the south heading correction. Obviously this will throw off the north correction, but the error will now be divided equally between the two headings. Last, go back to west and adjust the E/W screw to remove half of the west error.

Once the compass has been swung successfully, the results are recorded on a compass correction card, which is mounted next to the compass. Errors up to 10 degrees between the compass heading and a magnetic heading are acceptable. If the errors are greater than 10 degrees, there could be strong influences in the cockpit that the compensating magnets can’t cope with, or you were sloppy during your lineup. Start the correction card with a west heading with and without the radios on. Work your way around the rose, making correction notes every 30 degrees.

Repair or Replace?

These things don’t last forever. The baking 200-degree temperatures on top of a glareshield mean you’ll likely be faced with a repair or replacement. Generally, the main part that fails (ultimately leaking) is the rear rubber expansion/contraction diaphragm. Since the fluid in the compass needs room to expand and contract with temperature changes, a sealing membrane keeps the fluid inside. These simple devices aren’t packed with components. Typically, it takes just four small screws to expose the diaphragm on the rear compass housing.

For the simplest of repairs, Aircraft Spruce and Specialty sells a repair kit for the popular Airpath compass. For $11.50, it comes with a diaphragm, fluid and a glass gasket. But it doesn’t have a compensator, glass and other components that an instrument shop would use for a real overhaul. The kit availability makes one wonder about the strict rule about adding fluid being the domain of the certified instrument repairman.

aircraft sight compass

Still, more than one shop told us it doesn’t deal with bench repairs for compasses that need more than fluid top-offs, since it’s usually more economical to purchase a new replacement. Julie Lowrance at Kansas-based Mid-Continent Instruments and Avionics pointed out that proper compass repairs utilize a pressure chamber for removing the air from the instrument’s capsule as it’s filled with fluid. That’s something the average shop might not have. MCI’s busy instrument division doesn’t repair compasses, but instead offers new replacements, which range from $100 to $400, depending on the model.

We priced TSO’d replacements from multiple sources and found that a common Airpath C2300 starts at around $150—that’s almost as much as one hour of bench labor. Prices will vary depending on the mounting. For example, an Airpath C2400—which has an overhead mounting configuration—is $250.

We caution against ordering one and carrying it in to your shop without knowing exactly what’s required. If the shop has to change the mount, it could substantially increase the labor effort. They also come in specific lighting voltages and in northern- and southern-hemisphere configurations.

adjusting an aircraft sight compass

Meriden Markham Airport in Connecticut

Modern Replacements

If faced with a replacement and you want to abandon a whiskey compass for something more modern, it won’t be an inexpensive upgrade. One alternative is the SIRS Navigator, which is made in the U.K., but has TSO certification. The Navigator is a traditional design, but has modern features including blue LED backlighting and a fluorescent yellow legend.

We like its silicon damping design that all but eliminates the annoying bobbling found in other wet compasses. We don’t like the specialized adjustment tool that’s required to calibrate it.

The Navigator—which starts at around $260—comes in panel-top, overhead and pedestal mounting configurations. The Pegasus model is designed for in-panel mounting. While the SIRS products come with a 3-year warranty, distributor Aircraft Spruce said repair can only be accomplished at the factory in England.

Precision Aviation has close to 90,000 of its PAI-700 vertical card compasses in service. With a presentation that mimics a directional gyro, it’s easier to reference than a traditional mag compass. If you already have one and it needs repair, the factory in Houston, Texas, charges a flat-rate fee of $199 for complete rebuild, with a few days of downtime. Aircraft Spruce sells new ones, starting at around $375, but mounting hardware could increase the price.

Last, don’t underestimate the required installation effort. With calibration, you could be looking at an invoice that’s well north of $600.