Those rushed preflight walk-arounds are all the same the hand makes a quick pass over the props leading edge and then it hits the starter switch you not really knowing if the propeller is airworthy. We’ve been there.
Want a better respect for propeller inspections? Read NTSB reports written about propellers coming off in flight they aren’t pretty.
To supplement shop-performed prop inspections and maintenance, there are plenty of things an owner can do during service to keep the blades turning safely for a long time. we’ll mainly concentrate on inspection and repairs for metal props here, but offer tips for wood and composite props, when appropriate.
Basic Inspections
A propeller and its systems are more complex (and critical) than you might realize, evident by the detailed inspection procedures prescribed by the prop manufacturer. The good news is there is a lot of inspecting that can be done without even removing the blades from the aircraft. The FAAs advisory circular AC 20-37E is worth a read as it provides guidance for aircraft propeller maintenance. In particular, the AC provides information and suggests procedures to both increase service life and to minimize failures of metal propellers. Wood and composite props generally follow different repair guidance.
If your tool collection doesn’t include a high-quality magnifier, get one and a good work light. In addition to pitting and corrosion, you’ll be checking for maintenance-induced problems like missing safety wire and cracks around the attachment bolts, which happens when the bolts were over torqued. But start with the basics the right way.

At the very least, you should be performing a visual preflight inspection of the blades for nicks, scratches, dents, erosion, corrosion and cracks. Apparent damage should be referred to an appropriately rated mechanic because a crack or bend, as two examples, are cause for removal of the propeller.
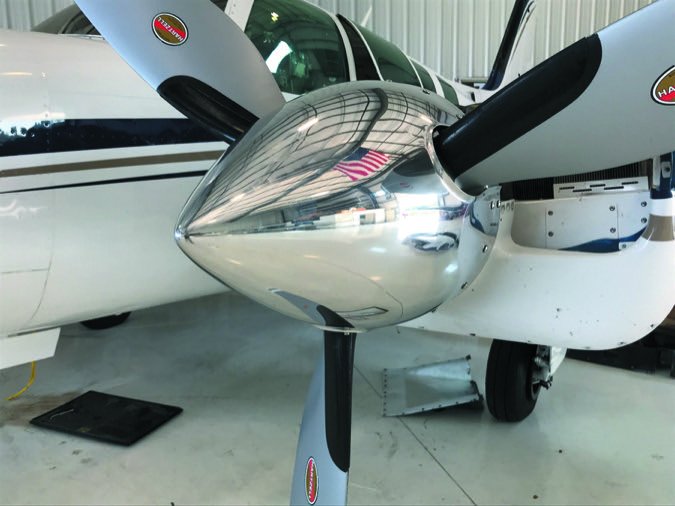
You can check the propeller spinner attaching screws for security and check the spinner for damage, as we’ll as for evidence of oil or grease leakage. Don’t be afraid to clean the propeller blades periodically using fresh water, a non-alkaline cleaner and a soft cloth or soft brush. Dry with a soft cloth.
If the aircraft (or prop) is new to you, this is also a good time make sure that the applicable installation, information and warning decals are on the propeller. These decals may include warnings against pushing or pulling on the prop, the model number, the correct bolt torque, dynamic balancing information and any other manufacturers identification.
While you’re at it, conduct a functional check including RPM control, RPM limits, idle setting, responsiveness and vibration. Of course, you have to start with a calibrated tachometer. We added an optical tachometer to the flight bag years ago and it was one of the best investments we made. Sportys currently sells the battery-operated TruTach II optical tach for $225, which is accurate to within 1 RPM and works with up to five propeller blades. Simply hold it above the glare shield, point it at the prop and compare its reading to the aircrafts tachometer. Tachometer inaccuracy could be a direct cause of propeller failure and excessive vibration.
When parking the airplane, move two-blade metal propellers to the one o’clock position to minimize bird droppings and water retention in the spinner. Wood propellers should be stored in the horizontal to prevent moisture accumulation in one blade, which would cause unbalance.
Last, be mindful of the surrounding area and surface conditions. Do not run up engines in areas containing loose rocks, gravel or debris. Avoid quartering rear winds during ground runups because this can cause damaging stresses. Do not push or pull on propeller blades when moving the aircraft by hand. If you must, grab on to the blades as close to the hub as possible.
Wood and composite propellers are susceptible to internal damage from small stone strikes that can create delamination or micro cracks and permit intrusion of moisture or damage to metal protection. When inspecting wood or composite propeller blades, look for cracks or delamination on the blade surface and at the edges of the blade. On wooden propellers, check the glue lines for debonding and look for warping and loss of protective coating or protective metal edge damage.
Unapproved Repairs

If your preflight inspection of the propeller does reveal questionable damage, resist the temptation to fly the aircraft even to bring it to the shop. Simply have a mechanic put his or her eyes on it to determine if it might need to come off the airplane. And if you hit something even a rubber parking cone don’t fly the aircraft without having the prop inspected by a mechanic. We know one pilot who admitted to hitting a cone, but still flew the airplane on a 400-mile trip at night, in the weather to find out one of the three blades was loose in the hub. He wins the Darwin award.
We also know pilots who attempted to straighten a bent propeller. This is a setup for doing more (often hidden) damage. There are some pretty crude unapproved repairs made. Never repair any blade defect by welding, heating or peening. Propeller manufacturers do not permit this because it can induce premature blade failure.
Do not fill any damaged areas of metal blades with bulk filler materials such as epoxy or auto body fillers. This prevents areas of potential cracking from being inspected. Consider that filling a damaged area will not correct the stress risers caused by the dent or those caused by the loading that introduced the dent. Also, do not paint over areas of corrosion on blades even with rustproof paint. Corroded areas should be removed in accordance with approved procedures prior to applying the approved protective finish.
When it comes to cracks, they may be present in the hub area between or adjacent to bolt holes and along the hub pilot bore. Cracks in these areas cannot be repaired and require immediate removal of the propeller.
Since propellers create stress to the surrounding structure, look past the prop for cracks and missing hardware especially on the cowling.
Common Damage: Tips
Blade tip damage is perhaps the most common and the manufacturers maintenance documents generally have instructions for repairing it. But if the prop manufacturer doesnt publish the repair information, there are specific procedures to follow for repairing nicks, dents, pits and cuts in the propellers tip. But you still need to consult manufacturers data. For example, any removal of the blade tip material that reduces the blade radius below the minimum specified for the propeller manufacturers model designation and specific installation criteria is not permitted. Other damage, including cracks in the blade, might be spotted during the repair. Keep in mind that cracks cant be repaired. Moreover, the presence of a crack pretty much indicates that blade failure is imminent and cracks on the leading and trailing edges are especially prone to propagation.
Blend-outs or repairs should never be attempted on these cracks. The prop must be removed from service and identified as unairworthy. If the manufacturer did not publish guidance, any authorized repair to the propeller tip should be inspected with a minimum 10X lens to ensure that any sharp notches at the bottom of the damage have been removed.
For leading/trailing edge damage, if the manufacturer did not publish information to the contrary, some repairs can still be made. For nicks, dents, pits and cuts in the leading or trailing edges of blades, ensure that the bottom of the damage is removed first by rounding out and fairing in the repair only slightly deeper than the damage. Initial removal of material should be done using a fine cut file.
All traces of file marks in the repaired area should be removed with #240 emery cloth followed by polishing with #320 emery cloth and then finished with crocus cloth or 600-grit emery cloth and then visually inspected. An individual edge repair should not exceed a depth of 3/16 inches. We’ve seen far too many amateur repairs done with coarse metal filing, which leads to stress risers and eventual failure.
For gouges, cuts and small dents on blade faces, ensure that the bottom of the damage is removed first by rounding out and fairing in the repair to form a saucer-shaped depression only slightly deeper than the damage. The initial repair should be accomplished by filing with a fine cut file parallel to the damage and finishing with #240 and #320 emery cloth, as in the manner of damage removal from blade-leading edges.
Even more substantial damage might not render the prop a total loss. Limited repairs may be made on propellers by appropriately rated maintenance technicians either on the aircraft or when the propeller is removed. Minor dents, cuts, scars, scratches and nicks may be removed providing their removal does not weaken the blade, substantially change weight or balance or otherwise impair performance. In the end, its best to leave the inspection and repair of more substantial damage to a certified and respected propeller shop.
Prop Balancing

Props can become unbalanced for a variety of reasons, including mishandling. Unauthorized or improper repair of spinners has also been identified as a cause of propeller imbalance. Its not rocket science; an unbalanced condition occurs when the mass of the propeller is not symmetrical around the center of rotation. When the mass is unsymmetrical, a radial force and/or out-of-plane moment couple is formed.
Static and common dynamic balance procedures only correct the radial force unbalance by adding an equal force in the opposite direction with balance weights. Only trained, specially equipped and authorized maintenance personnel should accomplish the dynamic balance procedures. There are two methods of propeller balancing static balancing and dynamic balancing. Neither method can replace the other because they are used for different purposes.
A propeller can be statically balanced only by removing it from the aircraft and evaluating the balance on a special fixture. Only appropriately certificated persons or shops may adjust propeller static balance. Static balance weights are added to or removed from the propeller to correct the measured imbalance, or material from the blades is removed by special grinding techniques.
Dynamic balancing of a propeller is done to provide for the lowest level of vibration in its operating range. Although the propeller is the focal point of the balancing procedure, it is the combination of the engine mounting system and the propeller assembly that combine to provide the given level of vibration. There are a lot of variables.
In the end, if you’ve replaced or had a propeller overhauled you know its a sizable investment. The only way to get long life from a prop is to operate it correctly and carefully, protect it from the elements (a prop cover isn’t a bad idea for outdoor storage) and ensure that even the most minor repairs are done per the manufacturers and the FAAs guidance.
FAA Plays Hardball With Sensenoch Prop Service
Proving that it takes propeller maintenance seriously, the FAA last month issued an Emergency Order revoking the repair station of Sensenich Propeller Service (the FAA order does not apply to Sensenich Propeller Company, although the two originally shared ownership). The FAA alleges that the popular propeller repair and overhaul shop, located in North Windham, Connecticut, knowingly and intentionally performed maintenance on 47 McCauley propellers for 45 separate aircraft that was contrary to instructions provided in the manufacturers overhaul manuals. The FAA further alleged that Sensenich and its accountability manager certified (signed off and returned to service) that the work was done in accordance with the manufacturers overhaul manuals and FAA regulations when company officials knew the props weren’t properly overhauled.
In the Emergency Order, the FAA alleges that the workers overhauling the props failed to perform a spring-load test or replace the propeller return springs, as required by the manufacturers manual. The shop didn’t own the equipment necessary to test the spring loads, the FAA says, and managers told employees to reuse the springs without doing the test as long as they passed the required limits on visual and nondestructive testing. The shop then approved the propellers for return to service, the FAA says.
The FAA document also cites a number of instances when the shop failed to replace springs, retaining rings, studs and screws, as required, and nonetheless approved the props for return to service. If youre concerned that your prop went through this shop, the FAA alleges the violations occurred between March 2015 and at least February 2017.
The company didn’t respond to our request for comment, but the FAA says both the repair station certificate and the repairman certificate of the accountability manager have been surrendered without appeal.


