Washing and Polishing: DIY The Right Way

A spiffy machine proves you take pride in ownership, but using the wrong products and technique can induce corrosion and trash pricey paint work.

Even the best professional aircraft detailers or products won’t be able to resurrect some neglected paint finishes. That’s why it’s important to preserve the paint finish early with regular cleaning and polishing.

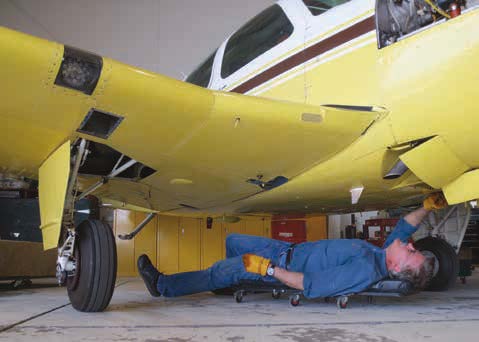
Far from a mindless chore, there’s more to do-it-yourself cleaning jobs than you might think, including protecting expensive accessories like antennas, de-ice boots and propellers. Like any other job you might tackle yourself, there’s a right and wrong approach to cleaning the aircraft. Here’s how we would do it.

Plan The Job

Before committing to an entire weekend spent in the hangar (that’s how long it can easily take to get the job done), you should be aware of the regulations at your airport. Many only allow washing in dedicated wash areas in respect for environmental considerations.

Know what power tools and household cleaning products should stay at home. This includes power washers. Ever see the damage a washer can do to pressure-treated deck wood? The same water pressure can easily dent aluminum aircraft skin. It can also blast soapy water into lap joints—a setup for corrosion.

Even if you use spigot pressure from a plain-vanilla garden hose, you need to be extremely careful where you point the nozzle. We’ve witnessed FBO line workers blasting water directly at static ports during wash jobs, and the resulting expensive static system work that often follows. Worse is dealing with the results of frozen static lines when you’re airborne. But there are other systems worth protecting and the aircraft’s operating manual might offer some guidance.

For instance, the Beech Bonanza manual has several pages dedicated to washing considerations. It says to cover up the brakes and disks with plastic wrap, use caution around the trim tab piano hinges and attaching hardware and to avoid using pressure washers directly on the airframe.

You’ll also want to avoid spraying control cables and pulleys—easy areas to inadvertently blast with the hose. The risk here is washing away lubricant from greased fittings. If you’ve been neglecting the fuel cap seals, an aggressive washing will send water into the fuel tanks. Sump the tanks especially well after washing.

The Wrong Cleaners

Before raiding your spouse’s kitchen cleaning cabinet, consider that common household alkaline type cleaners can be particularly harmful when it comes to accelerating corrosion. This is especially the case in aluminum and magnesium alloys. Hydrogen embrittlement is an environmentally induced failure process, and high strength, highly stressed aluminum or steel alloys are particularly susceptible to this process. The release of atomic hydrogen is a cathodic product of many chemical reactions, and can come from some alkaline cleaners, without chemical buffers.

There probably isn’t much you or the pros can do for the spent paint surface on the Cessna in this photo. You can make it even worse by using some household cleaners.

For more information on all forms of corrosion see the FAA’s AC 43-4A on corrosion control. It’s an excellent document for reference. Another is AC 43-205, which addresses approved cleaner standards. Absent of these documents, read the label. Formula 409, for example, says it’s not for use on uncoated aluminum. The Fantastik cleaning product will easily lift chalky paint if it isn’t diluted, so you might finally put the final nail in the coffin of your ancient paint surface.

While we used to use it freely around the shop, the run-of-the-mill Simple Green degreasing product isn’t recommended on aluminum. The same is true for other household cleaners. Instead, get the version of Simple Green that’s specifically made for aircraft use. It meets the Boeing specification as an approved cleaning agent. You’ll find it at many aircraft parts suppliers, including Aircraft Spruce and Specialty and Sporty’s, to name a couple. You can use it full strength (for degreasing neglected bellies, for example), or diluted.

We commonly see Varsol (aliphatic naphtha, a mild, petroleum-based cleaning solvent) being used in the shop to rid stubborn belly grease and inside the engine bay, but this may not be the best solution for do-it-yourselfers. Still, understand that mild detergents you might use to wash your Corvette just won’t be strong enough to clean your Cessna.

Part of your cleaning job should include refinishing the deice boots—a task that can be labor-intensive to do correctly

For all-around cleaning and airframe washing, many pros we talked with like Woolite (or an equivalent liquid wool-garment surfactant) and warm water, in a ratio of two ounces of Woolite to a gallon of water.

While it’s tempting to hit the local auto parts stores for bug remover products, use them carefully. When those big bad-ass southern bugs are a problem, we prefer a Woolite/water mix, applied with a regular sponge, then a kitchen sink scrub-sponge (you know the kind: regular sponge on one side and a tough, thin pad on the other). If that doesn’t work, you might carefully try a nylon pot-scourer—maybe for really tenacious bug remains. Any bug splotches that can’t be lifted by this should be washed, left to dry, then taken up one at a time with semi-abrasive polish applied with cheesecloth, using heavy up/down finger pressure.

As for automotive protectant wax, professional aircraft detailers we consult with advise not to bother using them on aircraft. Due to the friction that can build up during flight, an automotive wax will probably last one or two flights. Additionally, automotive waxes may contain carnauba and silicones, which can cause a buildup of static electricity and possibly cause interference with flight instruments and radio reception.

Washing the airframe with a brush is an easy way to snap a static wick. Use your arms instead.

The market has no shortage of aircraft-specific polish and we’ll cover them in a separate article. For now, understand there’s a sizable difference between polish and wax. Apples and oranges, actually. Think of polish as a paint cleaner containing abrasives and chemicals to remove oxidation, light scratches and environmental deposits such as bird droppings and the dirt and grime that makes the painted surface rough. A wax is simply a protective coating applied to a polished surface—like what you put on an automotive finish.

Start Buffing

Once you have the paint surface clean, your eyes will immediately focus on any unsightly paint oxidation. If your eyes can’t spot oxidation, your fingers can certainly feel it. If the paint surface feels chalky and rough to a clean, smooth finger, it’s oxidized. You’ll have some work ahead of you.

If there’s a little oxidation but the paint looks OK, you can just polish it with the buffer. If it’s been a long time since the plane has been polished—say a few years—and it’s not hangared, there’s probably a heavy coat of oxidation. Got a power buffer? You’ll likely need one.

Still, it might not make your work any easier because heavy oxidation is a bear to remove—sometimes too stubborn for a wimpy drill spinning a buffing wheel. In fact, it could make it even uglier. You might get halfway through the oxidation layer but the rest will be swirled into the paint by the motion of the buffer.

For heavy oxidation, you’ll need a high-speed tool, like a Milwaukee heavy duty polisher (to name one respected brand) using either polish or possibly a polishing compound. If you’ve never used a high-speed industrial polisher/buffer, your aircraft is not the thing to practice on. Get too aggressive and you’ll spin the paint right off the surface of rivets or for poorly prepped paint surfaces, you might strip the paint on flat surfaces. Using a buffer that has a trigger lock makes the machine easier to handle and provides a constant force on the surface. Use a polishing grade cotton bonnet for the buffer (have several on hand) that are large enough to efficiently do the large surface area of a typical GA aircraft. Think in terms of polishing several mid-sized cars. You’ve got a lot of area to cover. Most detailers we’ve watched start at the tail because it has the most detail and is the most time consuming. Again, the tail section probably isn’t the place to learn how to use the buffer. Try the belly, in case you dork it up.

We suggest not squirting the polish directly onto the aircraft’s skin, but instead onto the bonnet. If you leave the polish on for too long there’s a good chance the paint will discolor. Also, avoid polishing in direct sunlight and be sure there is always polish between the bonnet and the skin.

The right way to polish and remove even the slightest amount of paint oxidation is to use a high quality electric polishing machine with cotton bonnets.

You want to keep the buffer moving (which also helps spread the polish out) and not stay in one spot too long because excessive friction can damage the paint. You’ll know when you need to apply more polish to the bonnet when you start to see swirl marks in the paint. This will be even more obvious on oxidized surfaces. Conversely, you’ll know when you’re going a bit too heavy with polish because it will be flying all over the darned place. Be sure to wear safety glasses and always apply the polish from the top to the bottom of the aircraft. We got lazy once when polishing a Cessna equipped with vortex generators and destroyed the bonnet when it hit a VG. Luckily it took out the bonnet and not the structure. Remember, you’ll be working some areas by hand simply because the pad will be too big to effectively get the area around wing flap gaps, engine inlets, rubber trim and around antennas.

You’ll find that working a 4-foot section at a time yields the best results. Since sections of the aircraft surfaces won’t always be exactly flat, you’ll need to hit indents, rivet lines and seams by side-cutting with the buffer.

You’ll find that the effort requires endurance and good balance. It might be helpful to have a rolling shop stool, but when you move the buffer underneath the wing, get as much of the skin as possible while standing up. It’s harder to polish when kneeling or sitting down. When standing, hold the buffer against the aircraft skin by lifting up with your legs, the same way you would lift a heavy object.

Last, keep a blanket handy for draping over completed areas of the airframe because any polish that splatters on a completed surface will have to be buffed again.

Once the surface is polished, you’ll want to protect it. Paint shops tell us that silicon-based compounds can create problems when it comes time for paint touchups. As noted earlier, automotive waxes generally aren’t for use on aircraft. Better are the modern polymer and acrylic-based products. One popular polymer coating we’ve used is RejeX from CorrosionX Aviation. We found that it makes removing bird droppings and other contaminants pretty easy, plus it lasts a long time.

Don’t Forget The Boots

Cleaning and protecting de-icing boots is a job in itself. It requires a fair amount of prep work and leading edge boots aren’t wipe-it-clean accessories. The reward is a high-gloss finish and protection from harmful UV rays. It sure beats paying for new boots.

The pros refer to detailing de-ice boots as a refurbishment process because that’s pretty much what you’re doing. This includes stripping the old treatment and applying a fresh coat (several, actually) of boot sealant.

First, tape off the perimeter of the boots to keep the surrounding paint surface protected. This won’t be too difficult because the boots are generally parallel with the skin surface.

Once the surrounding area is protected, scrub the boots with an appropriate pneumatic boot cleaner and there are many to chose from. A few products we’ve used with good results are Arrow-Magnolia’s boot prep and sealer (available at Sporty’s), Pbs De-ice Boot System from Jet Stream Aviation Products and Plane Brite boot finish, although we couldn’t find a current source for it.

Jet Stream Aviation offers a lifetime satisfaction guarantee for its Pbs product and those we talked with who have used the product swear by it, which is specifically approved by Aerazur—the company that manufactures the de-icing boots for Daher’s TBM series turboprops.

Sponge on the boot prep and let it sit for a few minutes and agitate the surface of the boot with a clean, wet sponge. The goal here is to remove all of the old boot sealant. Next, saturate a microfiber cloth with clean water and wipe all of the prep from the surface of the boots. We suggest prepping the boots before polishing and protecting the aircraft paint because you’ll have a dripping mess of old sealant. It’s a sloppy job.

Once the boots are completely dry, it’s time to apply the new boot sealant. This is best done with a microfiber sponge applicator. The microfiber will help keep lint from building up in the treatment. The key here is applying multiple coats of sealant, allowing each one to dry completely before applying the next. Jet Stream Aviation suggests layering on four coats of its sealant. You’ll know when each coat is dry because the surface won’t be tacky. We found that it’s best to apply boot sealant on a relatively dry day because humidity will dramatically increase the drying time. Generally, once you get to the end of the boot, the rest of it should be dry.

You’ll want to paint the sealant on in one direction and avoid going back once you lay a coat on because the sealant has self levelers built in, potentially breaking down if you keep messing with it. The first couple of coats won’t look great, but the boots will take on a glossy, wet appearance after several coats. You might see air bubbles in the surface, which will disappear once the sealant dries.

Jet Stream sells the prep ($32.48 for a one-quart bottle) and sealant ($58.94 for a one-quart bottle) individually, or you can purchase the entire Pbs boot kit. It includes two quarts of Pbs sealant, four quarts of prep, two cans of the company’s Powerfoam spray-and-wipe foam cleaner, two microfiber applicators, two scrubbing sponges and a rinse bucket for $259.90.

Leave It To The Pros

If you don’t have the time, or simply aren’t comfortable with polishing your otherwise flawless paint job, you could bring it to the pros. And a pro who specializes in vehicles and boats might not have the skill or the tools to properly handle the job any more than you do.

For a small single, professional aircraft detailers might bill out a few hundred bucks for a complete external detail job, but that’s much cheaper than the average paint job. Better yet, learn to do it yourself—the right way.

Cleaning Away Turbine Soot

Fly a turbine aircraft and you’ll be faced with cleaning the unsightly black coating of carbon exhaust buildup the engine spits out. On turboprops, the staining may be the heaviest around the area of the exhaust stack, but it can send black streaks of soot down the side of the fuselage. They make stuff for that.

We sourced a relatively new product called Turbine Soot Master from Real Clean Detailing Products, which claims the streak-free formula dissolves grease, carbon and oil without requiring any rinsing. The drill is to spray the solution directly onto the soiled surface, wait 10 to 20 seconds and wipe the area clean with a microfiber cloth until it’s dry. There’s no need to rinse the stuff off because the cleaner isn’t caustic.

We tried Soot Master on a heavily coated exhaust stack and while it took a few tries to get it completely clean (trashing a couple of cleaning cloths) it was convenient and effective. There’s no reason why you can’t use Soot Master for other cleaning chores, including wiping away exhaust blowby grime from antennas, landing gear and other components. The company claims the cleaner is safe for all painted surfaces, although it will obviously strip away any protectant that’s on the surface.

For carbon soot that’s baked into the surface for a long period of time, the company sells the Streamline Speed Wax product. Rub it into the paint where it removes staining that Soot Master can’t. We can’t substantiate the claim because we didn’t try it.

But we did try Real Clean’s Post-Flight detailing spray. This is a liquid cleaner and polish intended for light-duty clean-ups. You know, park the airplane, hit it with a spray bottle filled with the stuff and simply wipe it off. It works well for removing bugs, fingerprints and dust, plus it contains micro-waxes that are safe for painted, aluminum, Plexiglas, polished plastic and wood surfaces. It leaves an impressive high-gloss shine and is easy to work with, even in direct sunlight. This makes it good for quick-turn ramp cleaning. A 12-ounce bottle of Soot Master is $12.95 and a 32-ounce bottle of Post-Flight detailing spray is $17.95. The company has an entire line of cleaning products that we’ll look at in an upcoming product roundup. Visit Real Clean Products.