When we talk with busy avionics shops around the country, it’s clear that electronic flight displays are tops for major upgrades. For aging aircraft, that means yanking out spinning iron gyros and usually the vacuum systems that feed them.
These upgrades replenish the used gyro market, making it easier to maintain older panels still sporting round-gauge flight instruments.
Busy instrument repair shops tell us that traditional mechanical gyroscopes are far from extinct, and even gaining popularity because of the choked supply chain—forcing owners to keep old gyros in service, at least for the short term. Eventually, this means dealing with inherent gyro failures and subsequent overhaul/repair decisions. With the right shop, this isn’t a bad plan, but maybe not for the long term if you plan to keep the aircraft.
INTERFACE MATTERS
When making the decision to overhaul a gyro or ditch it in favor of an electronic gyro, start by assessing the interface. Both attitude and directional gyros (and turn coordinators, too) often interface directly with the autopilot system, and removing them could mean having to replace the autopilot or buying an autopilot gyro emulator if you plan to keep it.
Attitude-based autopilots (and there are a lot of them—from early King autopilots to Century and some higher-end Cessna models) rely on the spinning attitude gyro for pitch and roll and reference, while some directional gyros have heading-bug outputs. Of course, the majority of modern EFIS models are capable of feeding even vintage autopilots the signals they need, if not through a smart converter box. Talk this interface through with your shop when deciding to overhaul the gyro or replace it.
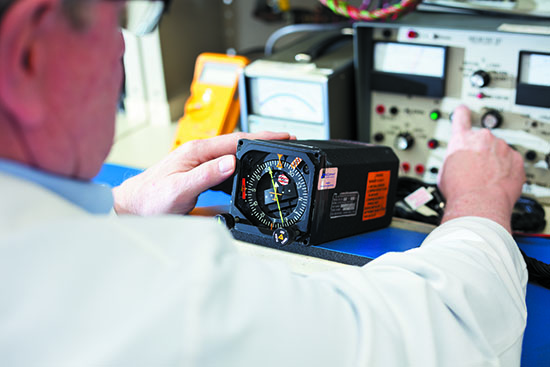
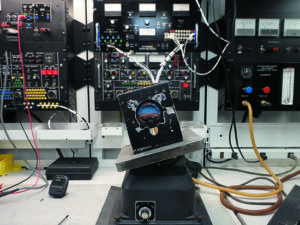
You’ll find that a repair or overhaul of common attitude gyros, DGs and HSIs will be cheaper than a full-up EFIS installation, but there are extra costs that can tag along with the job. That’s certainly the case with overhauling a King KI-256 flight director horizon gyro. It’s an integral component in the King KFC-series autopilots—the KFC-150 and KFC-200. In addition to the labor to remove the instrument, ship it out for overhaul and reinstall it after the overhaul (or installing a like-exchange), the shop generally has to calibrate the outputs so it flies the autopilot true. That means putting the instrument on a gyro stand and adjusting things like command bar alignment, bank angles and pitch references, to name a few things. We’ve seen too many shortcuts where the shop made the mistake of putting the instrument back in the panel only to have the customer come back because the autopilot didn’t fly correctly after the overhaul or exchange. The invoice grows in a hurry.
Consider that a typical zero-time overhaul or exchange for the KI-256 is around $3200. Add a few hours of shop labor, plus freight charges, and the job could easily come in north of $4000. That’s a situation where you want to look at long-term supportability and the value of upgrading to a digital gyro. For many, it also makes the decision to upgrade the analog KFC-series autopilot to a digital one, including Garmin’s GFC 500 and GFC 600.
But plain-vanilla attitude and directional gyros are generally a lot easier when it comes to labor, although prices aren’t getting cheaper. A complete overhaul on the 200-6/model 52D54 AIM autopilot directional gyro is priced all over the board. We spotted one instrument shop selling overhauled exchanges for $2200, but used (as removed, no warranty) as cheap as $200 on eBay. Consider the later a core unit, and plan on repairing or overhauling it. And this is what makes the used gyro market the so-called Wild West.
OVERHAUL VS. REPAIR
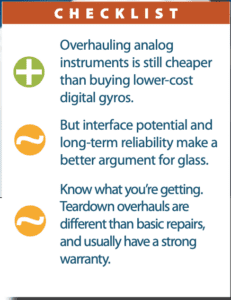
Know what you’re getting because the terminology could get lost in the communication. Better yet, when faced with a gyro repair, get a quote for both an overhaul and a basic repair, if it’s even possible. And for some aging nearly extinct gyros, an overhaul might not be possible (which makes the decision to upgrade to glass even easier). Part of the decision is the warranty—which tells a lot about the quality of the overhaul or repair.
Typically, a repair is covered for 90 days and only includes the work performed during the repair. The standard instrument overhaul warranty is generally one year, although some shops cover an overhaul for six months. Think in terms of convenience. Who wants to put the airplane back in the shop in a few months (or sooner) because the gyro failed prematurely? The point is you could spend $175 on a basic repair today, but might ultimately have to pay for a $700 overhaul next week, for example. That’s why for basic instruments, we think an overhaul makes the most sense—especially while the instrument is opened up on the bench. Low overhaul pricing is tempting and sometimes it works out in the customer’s favor. Other times it’s a setup for hassle. Even a quality overhaul with a high price tag might cause some grief as some gyros are just picky and not all techs are perfect every day.
As we said, not every instrument may be eligible for overhaul. Its vintage and version may have obsolete parts. This is problematic if you’re trying to get back in the air in short order. Mid-Continent Instruments and Avionics (with locations in Kansas and California) told us that the typical turnaround time may be five to 12 days, but an exchange will obviously be a lot quicker and often the best option if you don’t care about getting your specific instrument back.
Other shops admit that some vintage gyros are better off in the rubbish bin. This includes just about anything made by Narco Avionics, including the DGO-series HSI. But others, like the King KCS55A slaved compass system with HSI, may be worth saving, but get ready for a big invoice, and some troubleshooting along the way. We still get a fair number of emails here at the magazine from readers looking for troubleshooting advice for this system, especially when they take it to shops that aren’t experienced in working on the system. It’s complex and has several critical components, including the KG102A remote electric heading gyro. You’ll want a shop that knows how to troubleshoot the systems—especially the intermittent heading errors that might be common when the system fails.
On a side note, the KG102A is remotely mounted and sits on four shock mounts to dampen vibration. These gyros can live hard lives—often mounted in the tail section of the aircraft. You might pay for a pricey overhaul ($2500, on average) but if the shock mounts are worn out, the gyro can fail prematurely. That’s where a skilled tech with a good eye pays back tenfold.
Similarly, a good instrument bench tech will make an accurate assessment of the gyro’s health and advise the best course of action while the unit is torn down. For many instruments it’s usually not economical to simply replace a couple of the gimble bearings, given the level of teardown that’s required to gain access. Why pay for half of an overhaul when you don’t know how long the gyro’s main rotor might last?
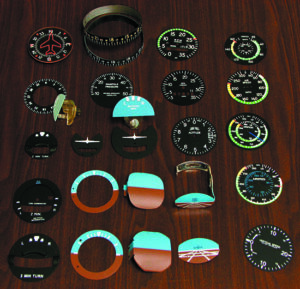
There’s also the point of aesthetics. If you send out a directional gyro for overhaul and are expecting it to look like a new one (maybe the glass is cloudy and scratched and the heading card is faded from the sun), you might be disappointed. In the world of instrument overhaul, you generally get what you pay for. Many shops charge extra for new dials and markings, while others include them in the cost of the overhaul.
Since the majority of avionics shops will source out the repair and exchange of gyros (and mark it up for profit), it’s up to you to ask exactly what you’ll get so there are no surprises. The better, high-volume shops generally stick with reliable instrument facilities because face it, they don’t want to deal with the hassle of having to pull the gyro out multiple times under warranty. Again, you generally get what you pay for. And if you want your original instrument back (rather than an exchange), request it. More often, the shop will simply exchange the instrument to reduce downtime. Instruments are shipped in large boxes, oftentimes by air freight. Expect to pay big for shipping and handling. It’s a real cost that shops do not absorb.
Last, beware of the shop that calls an instrument overhauled or rebuilt when it really isn’t. FAR 43.2 says, in part, that no person may describe in any required maintenance entry or form a component being rebuilt unless it has been disassembled, cleaned, inspected, repaired as necessary, reassembled and tested to the same tolerances and limits as a new item, using either new parts or used parts that conform to new part tolerances and limits. To sign a component off as being overhauled, nearly all of the above applies, except testing it to new part tolerances. That might not always happen. This is important in the world of spinning gyros.
Consider that properly overhauling a gyro includes replacing the bearings and any worn mechanical parts. It also includes disassembling the rotor assembly, while replacing any worn parts in it. Autopilot interfaces make the entire process more complex, often requiring additional work when the instrument is reinstalled because it should also include calibrating the electronic outputs. And sometimes boosting the autopilot’s performance means overhauling the gyro even if there isn’t an obvious sign the gyro has failed.
MORE THAN BENCH WORK
Don’t underestimate the importance of checking the rest of the systems in the aircraft (vacuum and electric) when it comes time for gyro swaps, and routine preventive maintenance can go a long way in ensuring the long-term health of a gyro. This includes changing the gyro filter—something that’s generally done as part of an annual inspections. Still, we’ve had our hands in some installations where it’s obvious the filter hasn’t been touched in years.
When a gyro goes in for evaluation (especially for a warranty repair), the bench tech will look for signs of contamination. This may show as debris in the instrument’s inlet screen, and it generally will void the warranty. Misadjusted vacuum regulators (don’t ignore high readings) or contaminated vacuum lines are no fault of the overhauler, so be sure your shop or mechanic covers all bases. Swapping a gyro on your own in hopes of saving a few bucks? See the sidebar on the next page.
SPINNING ELECTRIC
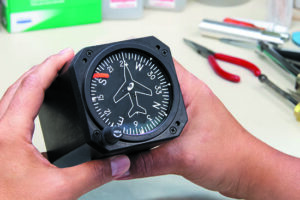
For owners who don’t want to deal with the downtime and expense of a glass upgrade, but want the increased reliability of electric gyros (over vacuum-driven ones), it’s possible to make the switch to electric attitude and heading gyros that fit in existing round instrument cutouts. Mid-Continent Instruments and Avionics offers the 3300-series electric DG, which is a direct replacement for the AIM205 and RC Allen RCA15 gyros. The new outright price of the 3300-10 is $3876. It weighs around 2.0 pounds, has FAA TSO C5e certification, plus a warning flag circuit that monitors the gyro’s rotor speed and power input. The instrument is marketed at high-stress and high-vibration applications, including helicopters and aerobats.
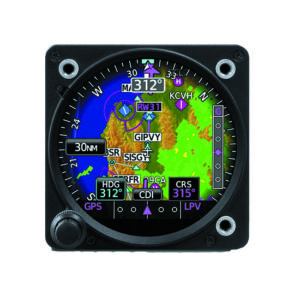
There is also a variety of electric spinning attitude gyros from RC Allen, Castleberry and Mid-Continent. These flirt with $3000, so price the cost of entry-level EFIS, which almost always offers more capability and interfacability. The uAvionix AV-30 series drop-in has multifunction capability and starting price of $1995 for the certified version. Garmin’s G5 electronic attitude instrument starts at $2725. Like the AV-30, it has a backup battery, and dual G5 instruments offer reversionary capability since you’ll have dual ADAHRS and dual backup batteries. There’s also the Garmin GI 275, which we’ve covered in detail in Aviation Consumer.
[su_box title=”DIY GYRO Swaps: Some Disassembly Required” box_color=”#031687″]
If you’re an A&P mechanic or work closely with one (who can sign it off and bail you out if you get stuck), you might save some dough if you handle a gyro replacement on your own. While shotgunning a basic attitude or directional gyro isn’t complicated, you’ll soon see why people who do this sort of thing for a living complain about being underpaid. Gyro swaps on Cessna P210s come to mind.
The first thing is making sure the gyro is really dead and not just a symptom of some other failure, like a cracked or collapsed vacuum line. Of course, if all your vacuum instruments roll over and die, you’re probably looking at a vacuum pump problem. Throttle the engine up and watch the suction gauge. (For twins, run up each engine separately, then together.) The suction gauge should come up to a normal reading and then stabilize. The reading should not follow the throttle (if it does, you could have a clogged or sticky relief valve). When you’re sure that the vacuum system is good, confirm that the offending instrument is still inoperative or erratic. If you can roll the seats back far enough to worm your way under the panel (warning: this is what back injuries are made of), then grab your flashlight for an inspection.
Examine the vacuum lines leading to the offending instrument. Are they connected? Are they kinked or pinched or rubbing on the control cables? Do they show signs of collapse or cracking? If it all looks good, it’s time to pull the instrument. You’ll need a set of Allen keys for the set screws that hold the knobs on most instruments to the shaft. Remove the plastic overlay (or move it away from the instrument) if your panel still has one. Move any wiring bundles out of the way. This may involve clipping some tie wraps or removing some standoffs.
Mark anything that you disconnect behind the panel including electrical connections on the instrument. Open-end wrenches generally work best for the vacuum fittings. Label the lines/fittings or take a photo. With the back of the instrument free, undo the panel mounting screws using care not to strip the heads. These are usually No. 1 Phillips screws. Get an assistant to unscrew the instrument while you hold it in place, and when it’s free, work it out from under the panel. Obviously it’s easier with instruments that mount from the front. Installing the replacement gyro is done in the reverse order, but be very careful about banging it around. With you holding the gyro, it’s easier if a helper lines up the screw holes and secures them. Don’t overtighten the vacuum fittings or you’ll crack the gyro’s case. Be sure nothing is in the way of the controls, including wiring bundles. Have someone move the yoke full travel while you observe under the panel. Finally, do a runup on a level surface and observe the suction gauge, while making sure the instrument is level in the panel. Test fly the plane in VMC for a final inspection.
[/su_box]
ADVICE FROM THE PROS
We find that established shops with good bench repair capability can make quality repairs to aging HSI units, including the King KI-525A, as an example. This is another major component in the King KCS55A system, but parts could be tough to come by as time goes on. “Parts are getting harder to find and units can only be overhauled or repaired so many times. So for those customers, we offer them Garmin’s GI 275 solution as a replacement,” TJ Spitzmiller at Sarastota Avionics in Florida told us.
Just about every shop we talked with said use caution with older Century instruments (these gyros are part of Century/Piper autopilot systems), where quick factory support may be difficult. On the other hand, long-standing instrument shops like Kelly Instruments in Wichita, Kansas, still work on the old stuff. A rep at Kelly told us the shop’s gyro repair bench hasn’t seen a slowdown, even with the popularity of budget glass. It puts a one-year warranty on many of its gyro overhauls and has the capability to overhaul and repair a wide variety of gyros.
“With the increase in complex, integrated avionics, we continue to support those who rely on legacy instruments—from simple repairs to teardown overhauls,” Julie Lowrance from Mid-Continent Instruments and Avionics said.
Perhaps the best advice comes from Todd Adams at Lancaster Avionics in Pennsylvania. “Do upgrades on your own terms and don’t wait for something to break,” he told us. His point is we’ll taken, especially when it comes to dealing with aging gyros and a worsening supply chain. If you procrastinate, eventually you might be faced with spending good money after bad just to stay in the air.