Hangar Tools: Start With The Essentials

Tooling your hangar for light DIY aircraft maintenance should include good lighting, safe parts storage and model-specific specialty items.

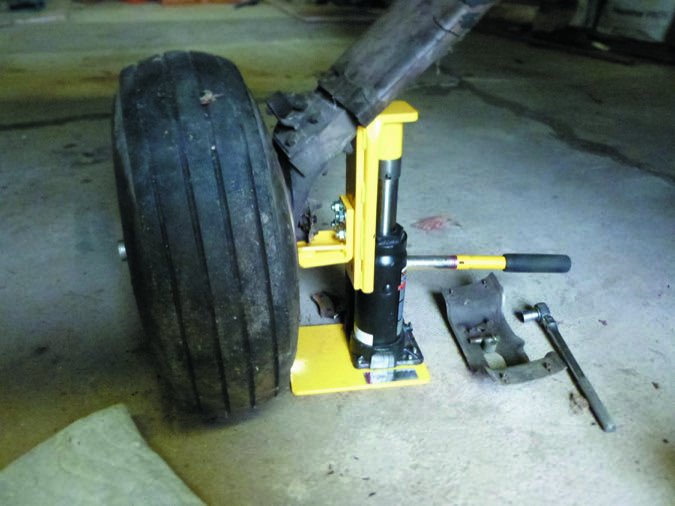
Whether you’ve earned the A&P rating to wrench your own aircraft or plan to tackle the FAA-approved light maintenance items you can accomplish as an owner, you need the right tools and workspace for the job.

But don’t just think in terms of hand tools. While you’ll certainly need them, there are other supporting accessories and space considerations that will make even the simplest of jobs possible. In this article, I’ll offer my personal advice based on years of experience wrenching my own aircraft on where you might start.

Maintenance Tolerable

A hangar is just a big room that you build, buy or rent until you start to work in it. At that point, it becomes an extension of you. First, decide just what you plan to do with this space and stick with that plan. I have seen hangars that are ratholes and ones that rival B-2 service bays at Whiteman Air Force Base. I know of one hangar that houses a Cirrus along with a mirrored bar, granite countertops and an office with ten-foot-tall, half-inch-thick glass doors where the owner conducts his business. A few bays down there is a hangar equipped with major parts from five Piper Cubs, a Luscombe, a vintage glider, a Cessna 172, several Porsches and tools that make Sanford and Son’s junkyard look like an operating room.

The point is, everyone is different, but everyone is the same. It’s the approach to wrenching your own stuff that makes the difference. That approach starts with good organization, and it’s how good maintenance shops operate. You should follow their lead and start with effective overhead lighting, while considering where even the simplest items will be stored. Basic things like a stepladder, a sturdy stool, extension cords, portable lighting, a vice and a cabinet to hold paperwork, clipboards, office supplies and parts and maintenance manuals for your airplane will take space and need to be considered.

The focal point of your work-space will be the workbench. Every shop must have this go-to location equipped with good lighting, a vice and accessible hand tools. A bench that stands waist high usually works the best and it should have lots of toe space, plus enough surface area to accommodate parts bins for storing removed components and spare hardware. I always keep a lighted magnifying glass close at hand.

Speaking of lights, LED bulbs make it easier than ever to create a well-lit workspace and I think they’re worth the investment. Some directly replace old incandescent lamps. You can never have too much light and for around $100, you can have a space that’s as bright as daylight.

Battery plug
The BatteryMinder is key to battery health.

Obviously a heated hangar is important for tackling major projects in cold climates, but there are ways to make it more bearable if you don’t have central heat. Insulation held in place by plywood with at least an 8-foot reach will offer some climate control, plus provide structure for securing shelves. At the least, it might tame cold drafts.

A propane heater might be enough to take the chill off in the winter and a ceiling fan might be enough to work comfortably in the dog days of summer. How you handle climate control is up to you, but the key is to create a space with enough comfort to make any maintenance tolerable in all seasons.

Working Essentials

A hangar used as a shop has to be comfortable and designed to be “handy.” There has to be organized storage for everything simply to make it easy to find and to access stuff while you’re working. Commercial or homemade shelving is a must, and a lot of mechanics work off of tool carts that hold the tools for the job, the parts from the job and can be rolled around the workspace.

I’ve found that a basic yet high-quality tool cart can be sourced at Harbor Freight Tools (www.harborfreight.com) for under $70. A low-profile, roll-around shop stool is a back saver. You might also consider a creeper for working around the underside of the aircraft.

Champ plugs
A spark plug tray protects delicate plugs.

Once you have the space set up, it’s time to tool up. I’ll say that you don’t have to buy the best hand tools, although as the sidebar on page 21 describes, serious wrenching deserves serious tools. Still, you want higher-quality tools that will hold up and are dimensionally precise. If you’ve ever used a cheap screwdriver or socket and stripped a piece of hardware, you get it.

The majority of aircraft in the U.S. are mostly SAE, not metric (there are exceptions, including Socatas), and for starters, you will need 1/4- and 3/8-inch drive ratchets and sockets. You’ll also want a torque wrench that is calibrated. The largest nut you will probably ever work with will be an axle nut or some nosegear nuts like you’d find on Grumman and Cirrus models. Based on how much you plan to tackle, you can figure out the rest of the standard hand tools you’ll need. Again, don’t source the cheapest quality tools. Breaking a tool in the middle of a job is bad enough; damaging a perfectly good airplane is a mortal sin!

If in doubt, I suggest sticking with Snap-On, Mac Tools and Kobalt, to name a few of the better brands, based on my experience. I discovered Wera Tools at the recent AirVenture and from what I saw, it specializes in ergonomically smart tools, including the Zyklop ratchet and Joker open-end wrench.

Something I think should be in every hangar toolbox is a multimeter. You know, the mysterious gizmo that has a red and black lead and either a digital readout or analog needle. While they look complicated (there are good tutorials all over the internet), the reality is that you will generally use three or four settings when working on your aircraft. All the rest of the numbers, blocks and sections are for more sophisticated work. Multimeters pretty much all work the same way—whether cheap ones or expensive ones—just with different degrees of ease. While many avionics pros will agree that Fluke (www.fluke.com) sets the standard, I simply recommend one that is sturdy, lighted and has an audible tone for the resistance mode. The two most used basic functions are to check for continuity and to check for a current drain or voltage.

meter
A multimeter is a gotta-have tool.

For example, if you get a light that doesn’t work, is it because the bulb is burned out or is there no power or ground? If you don’t measure any power to bulb, it could be the switch, the circuit breaker or a broken wire. Proper troubleshooting even on the most basic level can’t be accomplished without a meter. You should have one.

Specialty Items

Besides the basic stuff, you will need certain things that are specific to aircraft. Safety-wiring pliers and aviation-grade wire are a must. Snap ring pliers are also handy to keep close at hand. Like run-of-the-mill hand tools, the specialty tools you stock will depend upon how deep you want to get into the work. I’ve found that most of what you will need for typical DIY work can be purchased from Aircraft Spruce and Specialty (www.aircraftspruce.com) and other specialty aircraft mail order suppliers, including Chief Aircraft (www.chiefaircraft.com), or directly from tool manufacturers like ATS, Cleveland and Brown.

Open oil filter
A filter cutter is an essential tool for oil changes.

Even tasks as rudimentary as oil changes can be better accomplished with the right specialty tools. This includes an oil filter torque wrench and an oil filter cutter for inspection of the media for metal contamination. If you use a spin-on filter, including a Champion, Aircraft Spruce offers a $88 cutter made for it. Other specialty tools for specific routine maintenance include a spark plug gapping tool, spark plug storage tray, plus a 7/8-inch deep well spark plug socket to get the plug unthreaded. Don’t forget to stock the toolbox with anti-seize compound.

One gadget that gets high marks for simplicity is the Tempest AT5K spark plug resistance tester. This $130 tool (you can source one from Aircraft Spruce) is nothing but a simple resistance bridge with a go/no-go test protocol. Mount the plug on a probe, which connects the harness end of the plug, then touch the tester’s lead to the center electrode. If the indicator glows green, the plug is good; if it’s red and green, the plug is serviceable. Red means the plug’s resistance is greater than 5000 ohms. If you don’t want to spend the $130, you might use a multimeter to test the plugs, but the resistance probe might not easily reach the bottom of the plug’s center well. Moreover, this isn’t a replacement for bomb testing to confirm a clean spark.

Other handy accessories I keep in the toolbox are a set of punches, a full set of Allen wrenches and bits, plus a screw extractor set.

Once you have a healthy start with hand tools and specialty items, you’ll want to look at the more esoteric stuff. For example, I’ve found that an air compressor is your best friend around the hangar. Whether it’s a small pancake-style compressor or a large stand-up unit, eventually you’ll be looking for compressed air to service tires, for spray cleaning and even paint touchups. The more work you’ll do, you’ll find the need for more compressed air.

at5k tester
Checking spark plug resistance is easy with the Tempest AT5K tester.

If you plan to tackle your own compression checks (with the help of a qualified assistant) or even have your mechanic make a hangar call to perform an annual inspection, the compression test will require compressed air with the differential tester tool. Also realize that air tools—even cutting tools, ratchets, drills and buffers—require lots of air. Go big. Portable oil-free air compressors might range from $100 to over $500, while gas-driven compressors can run well over $1000. Grainger (www.grainger.com) is one good source for quality units.

All Jacked Up

If you work on tires or landing gear, or perform routine inspections, you’ll have to lift the aircraft. I like the configurable Tribal floor jack from Bogert Aviation (www.bogertaviation.com). The company was started by Richard Bogert who for years ran a one-man shop and as a result, developed a number of intelligently designed and well-built tools to make the job easier. Many are designed with an emphasis on safety, especially when working on landing gear, tires and brakes.

Bogert has a simple tool for breaking the bead on a tire without damaging the soft aluminum or magnesium wheels. The $207 Tire Bead Breaker was designed specifically for small aircraft tires (although it can work on ATVs and motorcycles) and works on tubeless and tube tires.

On a side note, Bogert Aviation also makes high-quality replacement aircraft battery housings. When we evaluated them in the February 2015 issue of Aviation Consumer, we found the construction quality to be superior to some OEM battery housings.

bead breaker
That’s a screen grab from a Bogert Bead Breaker tutorial.

Another hangar tool I recommend is the BatteryMinder (www.batteryminders.com). It’s not a typical battery charger, but instead a tender that’s calibrated to aircraft batteries and can automatically diagnose, charge and desulfate the battery based on charge and temperature status. There’s also an optional hardwire kit ($69) for easy plug-in.

A more advanced diagnostic tool to consider is a borescope imager. We looked at borescopes in the October 2015 issue of Aviation Consumer and found that prices are down and quality is up. They aren’t just for cylinder walls, valve and piston inspections.

You can use a borescope as an inspection camera around the airframe, and some can be had for a few hundred dollars. We found various smartphone/app-driven camera cable models that might be used for all-purpose applications.

Last, when doing aircraft maintenance in a personal hangar, abide by the standards set by the airport management. When it comes to wrenching, make an honest assessment of your technical abilities, get the tools to match and then organize the heck out of them.

Snap-On Tools: Still The Gold Standard
Walk through most aircraft maintenance hangars and you won’t have to look hard to spot the Snap-On tool logo. Whether it’s a gigantic rolling tool cabinet or a pair of cutters, there’s a reason why professional technicians invest big for Snap-On tools. There’s a rich heritage behind what many believe to be the gold standard in tools, which dates back to 1920.

Gregory Narozniak, an independent authorized Snap-On franchisee in central New Jersey, rattled off a long list of traits that lend to Snap-On quality. The photo to the right is the interior of his traveling tool warehouse—part of the Snap-On convenience and support effort. According to Narozniak, when a tool is designed or an improved version is created there are hours upon hours of engineering incorporated into that tool, which is evident in user ergonomics and precision.

snap on truck inside

“When the instinct handle on a Snap-On screwdriver fits better in the hand, it simply makes the tool more efficient,” Narozniak told me. Additionally, the steel that’s used during manufacturing is often specific to a tool. For example, the shock-resistant steel used in Snap-On screwdrivers, punches, chisels and so forth isn’t particularly the best fit for the company’s sockets, so a different steel blend is used in those sockets. Similarly, a different blend of steel is specific to Snap-On wrenches.

One of the many primary differences between lower-quality tools and high-end tools like Snap-On is accuracy. Snap-On’s sockets and wrenches utilize flank drive, a concept that came at the request of the United States Navy in 1960. There was a need to remove bolts with rounded corners and as a result, the socket had to be designed to grab the flat part of the fastener rather than the corners. The design is still in use today on Snap-On flank drive and flank drive-plus tools.

The other draw that keeps technicians coming back to Snap-On is the support and warranty. According to Narozniak, Snap-On battery-powered tools are one of the only industrial product lines that carry an extensive warranty, which can initially be one or two years, depending on the item, and after the warranty expires, the tool is covered with a flat-rate repair should anything go wrong.

Moreover, nearly all of the company’s hand tools are covered under a no-hassle lifetime warranty. “Simply hand the item to your Snap-On franchisee and it will be covered,” Narozniak told me. He’s right. I once dropped a small Snap-On torque wrench off a wing and the visiting rep grabbed a replacement from his truck and handed it to me.

Snap-On tools are available for purchase through a local authorized Snap-On franchisee or via www.snapon.com.

—Larry Anglisano